When ever anyone goes to New York City, the first place the go for food is a bagel place. Last year, I went to Liberty Bagels in Midtown, and they were the best bagels I had ever had. They were huge, fluffy and chewy. Ever since that, I have been trying to find a recipe that re-creates it at home. After testing multiple recipes, I have one for you that re creates a genuine NYC Bagel. A simple recipe that produces a bagel with a deep crispy crust and a fluffy, hurt your mouth chewy interior.
You start by making a quick and easy pre-ferment for the dough, and then add more flour later. This is very flexible on the timing, it can be 2-3, or you can forget about it, and make it half a day later. Either way, they will come out well.
Starter Directions:
1. Combine 250g (1 1/2 and a tablespoon) bread flour, 1 tsp active dry yeast, and 350g (1 1/2) water, in a large metal bowl, cover and let sit for 2-7 hours, until bubbly and full of yeasty flavor.
Dough Directions:
1. After the pre-ferment has rested, combine 425g (about 2 cups) of bread flour, 25g granulated sugar (1 1/2 tablespoons), and 10g (1 tablespoon and a teaspoon) in a separate bowl, and whisk them together.
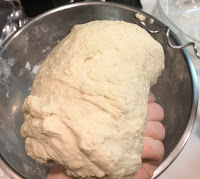
2. Use a hand/ stand mixer with dough hooks, and add the new dry ingredients a tablespoon at a time. When it is solid, you want to knead with the mixer for 20 mins. The dough will be tough, so you cannot do this by hand, and this is necessary for developing gluten, which yields a super chewy bagel.
3. After kneading for 20 mins, place the bowl in the fridge for 20 mins. After it rests, divide the amount of dough by 8, which makes about 120g-130g bagels. It helps to weigh them to divide evenly. Create balls of dough, and then flatten down so they are wide, and not too tall.
4. Place on a parchment lined baking sheet, and cover and put in the fridge for 20 mins. When they are chilled, take out and begin to form into bagel shapes.
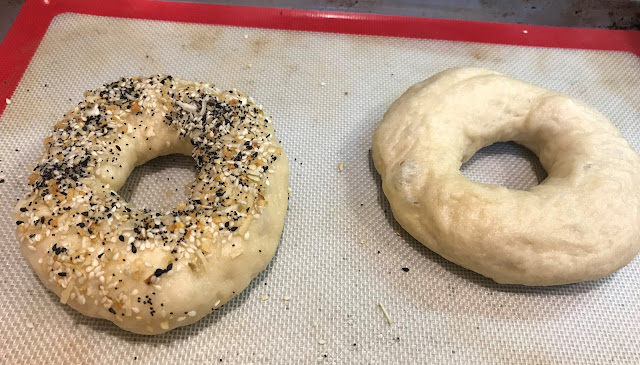
5. Pinch the middle with two fingers, and then place both your pointer fingers in the hole that you just made and swirl them around and slowly move them to the outside, stretching it. Then cup with your hands and stretch some more (I'll have pictures).
6. Place back on your tray and let sit in the fridge overnight, ready for cooking.
Cooking Directions:
Cooking Directions:
1. Set a pot of water the boil, and add in a tsp of baking soda. Let the water boil semi-rapidly, but not violently, but not a simmer. It has to bubble so that it inflates them, but not so much that it hurts the dough.
2. Boil them for 2 mins on each side (helps develop the deep crispy crunch) and be sure not to overcrowd in the pot or in the oven.
3. Add any seasoning after they come out, and then put on a parchment lined baking sheet.
4. Place in a 425F or 220C oven for 10 mins, and then turn the tray, and then let them stay in for another 3 mins, and then flip on the tray and then put back in the oven for another 4 mins.
5. After they come out of them oven let them sit, and when warm, cut and enjoy!


Comments
Post a Comment